Configuration (Outlook 2011)
Configuration (Outlook 2011)
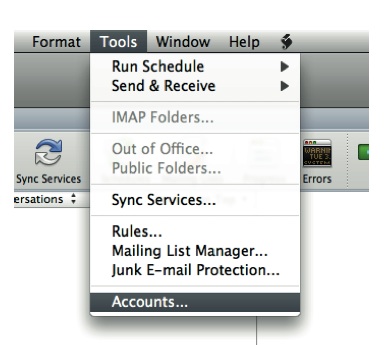
Hosted Exchange set-up guide1. Open Outlook 2011 for Mac. From the top menu, click the 'Tools' option, then select 'Accounts' from the drop-down menu
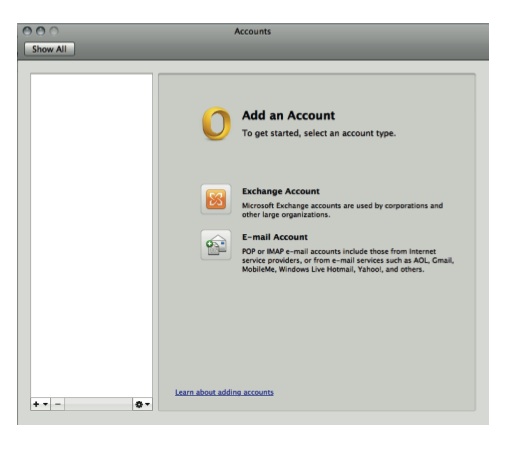
2. The 'Account' window will open (see below). If this is the first account to be added to Outlook, click 'Exchange Account' from the two options.
If another account already exists on Outlook, please click the small '+' sign at the bottom left and then select 'Exchange'
3. A box will drop down and you will be asked to enter your account information. In order for your account to set up automatically, you must have the 'autodiscover' records added to your DNS settings
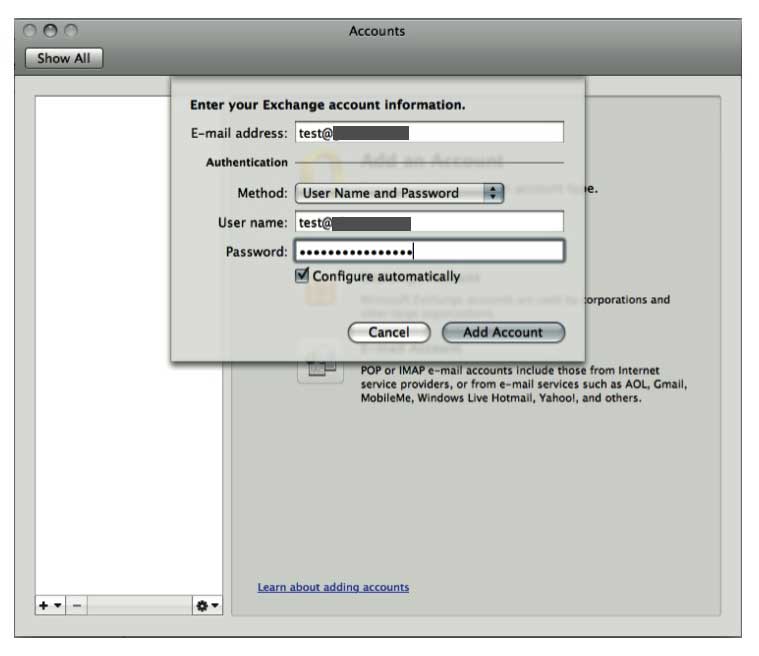
4. Enter the mailbox address in the 'Email Address' box and the same in the 'User Name' box, with your account password created when adding the mailbox in the control panel.
Tick the box 'Configure Automatically' and then press the 'Add Account' button
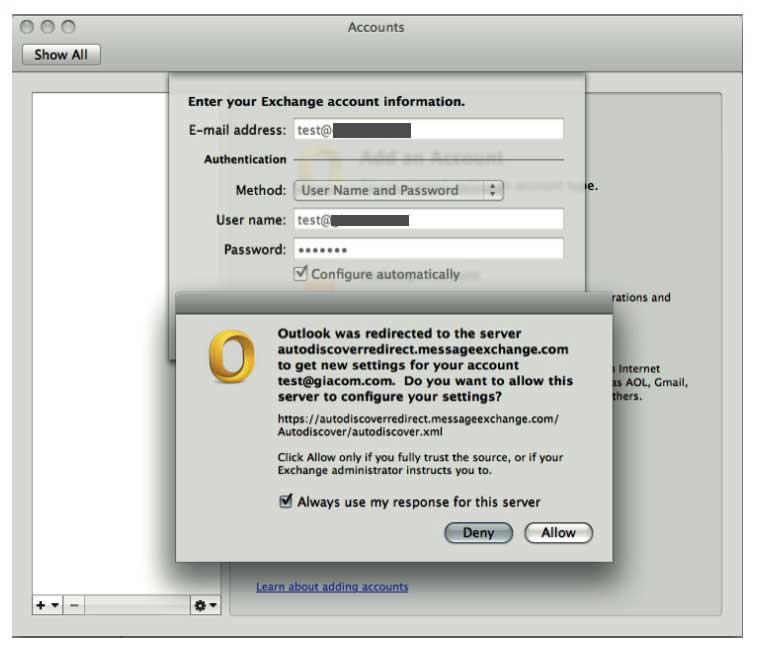
5. After a few seconds, you should be presented with the alert as above. Please tick the 'Always use my response for this server', and press the 'Allow' button
After a short while, your account will authenticate and you will return to the Account screen which can be closed by clicking the small 'x' in the top left. You'll then see any mail on the server starting to sync with this installation of Outlook - this may take a few minutes to complete, depending on the amount of messages held in the server
